Run Cyber Chief Scans from Jenkins using Cyber Chief Security Scanner Plugin.
- In your Jenkins Dashboard, navigate to
Manage Jenkins > Manage Plugins - Select Available Plugins and search for
Cyber Chief Security Scanner - Install and restart your Jenkins console. You can confirm that the extension is enabled if you go to
Manage Jenkins > Manage Plugins > Installed Plugins > Look for Cyber Chief Security Scannerand see if its enabled.
- Create a Freestyle project and name it anything.
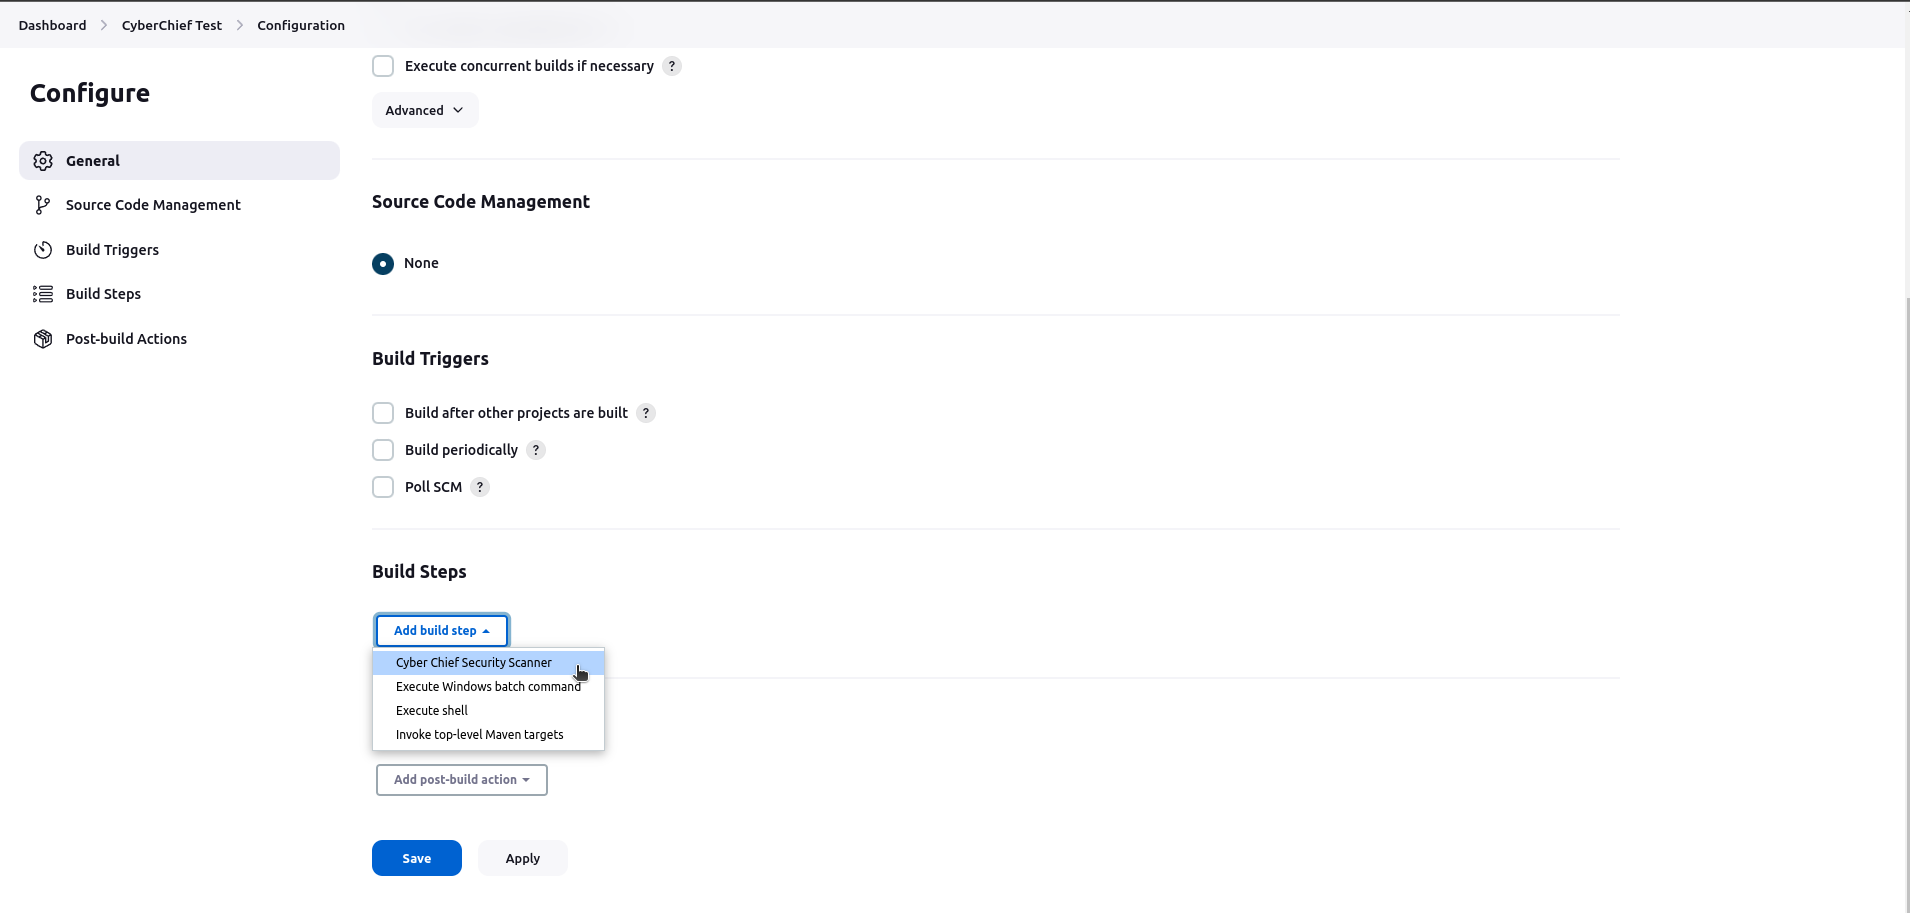
- Navigate to
Configuretab and selectAdd Build Step. - Select Cyber Chief Security Scanner.
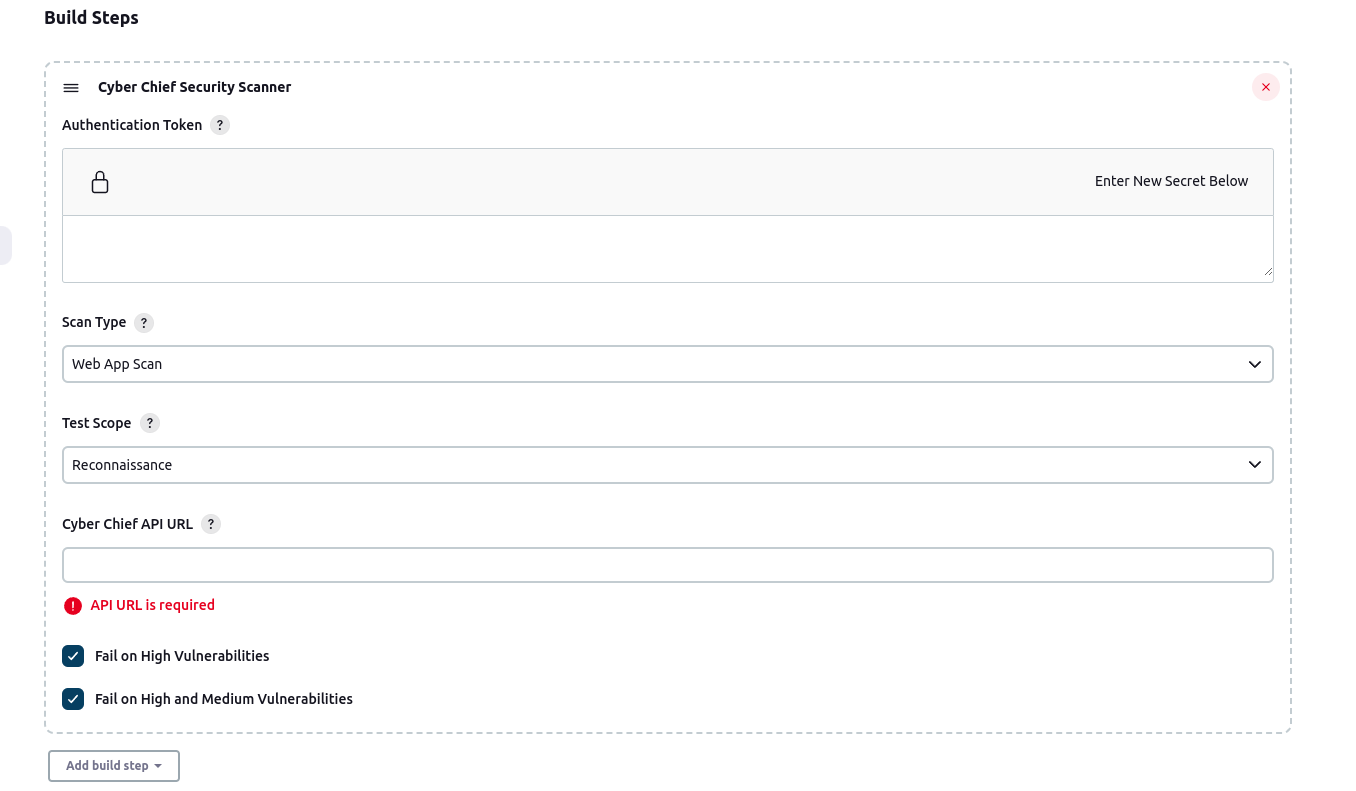
- Configure the form fields as required.
Auth Tokenis located on the left side of your Cyber Chief Workspace Admin PageAPI URLis located below theAuth Token- Select what type of Scan you want to run
(Web App, API, Raider)- For Web App Scans: Select the scope of the scan
- For API Scans: Input API Name
- For Raider Scans: Input Raider Name, Select Regions, Services, and Frameworks
- You have the option to fail the build when:
- High Vulnerabilities are found
- Both High and Medium Vulnerabilities are found
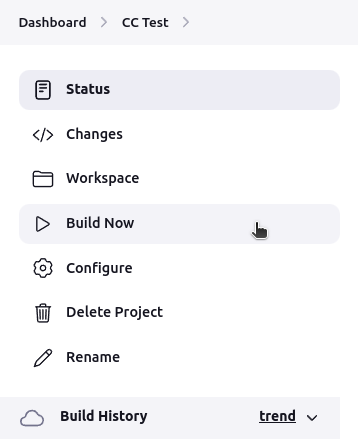
- NOTE: If you have chosen not to check them both, Jenkins will run a scan on Cyber Chief without waiting for the results after clicking
Build Now.
- Save and click Build Now
Licensed under MIT, see LICENSE


