Receive GitHub, GitLab, Bitbucket, and Gitea webhooks in Jenkins without exposing Jenkins to the public internet. The plugin opens an outbound connection to a Webhook Relay bucket and forwards every webhook it receives to the matching Jenkins endpoint (/github-webhook/, /bitbucket-hook/, …), so your SCM can trigger builds even when Jenkins lives on a private network, behind a firewall, or on your laptop.
Because delivery goes through a Webhook Relay bucket (the forwarding feature — not a tunnel), every request is recorded on the bucket's logs page, giving you a full request/response history for debugging.
GitHub / GitLab / Bitbucket
        │  (webhook)
        ▼
https://<your-bucket>.hooks.webhookrelay.com      ← public URL you paste into the SCM (GitHub, GitLab, Bitbucket)
        │
        ▼
   Webhook Relay bucket  ──────────────►  logs page (every request + Jenkins response)
        │  (outbound WebSocket, started by the plugin)
        ▼
   Jenkins  →  /github-webhook/  →  build triggered
- The plugin authenticates to Webhook Relay with your API token and subscribes to a bucket over a persistent outbound WebSocket (
wss://my.webhookrelay.com/v1/socket). No inbound ports are opened on Jenkins. - When a webhook hits the bucket's public input URL, Webhook Relay streams it down the socket to the plugin.
- The plugin replays the request against the Jenkins webhook endpoint for your SCM (selected via the SCM Webhook Preset) and sends Jenkins' response (status, headers, body) back to the bucket log.
Install from the Jenkins update center: Manage Jenkins → Plugins → Available plugins, search for Webhook Relay, install it, and restart Jenkins. Alternatively, download the .hpi from the plugin page and upload it under Manage Jenkins → Plugins → Advanced settings → Deploy Plugin.
You will need a free Webhook Relay account and an API token (create one here).
- Go to Manage Jenkins → System and scroll to the Webhook Relay section.
- Enter your API Key and API Secret (get them here).
- Enter a Bucket name (e.g.
jenkins-plugin). It can be an existing bucket or a new name — the plugin creates it for you. - Choose your SCM Webhook Preset (GitHub, GitLab, Bitbucket, Gitea, or Generic Webhook Trigger).
- Tick Enable and click Save.

When connected, the Connection Status shows ✔ Subscribed. Use Test Connection to verify your credentials without saving.
Click Get Webhook URL to resolve the bucket's public input URL (creating the bucket if needed). A dialog shows the URL with a copy button and a link to the bucket — paste the URL into your repository's webhook settings.

| SCM | Where to paste the URL | Webhook content type |
|---|---|---|
| GitHub | Settings → Webhooks → Add webhook → Payload URL | application/json |
| GitLab | Settings → Webhooks → URL | — |
| Bitbucket | Repository settings → Webhooks → Add webhook → URL | — |
| Gitea | Repository settings → Webhooks → Add webhook → Gitea → Target URL | application/json |
That's it — you don't change anything else in the SCM. Webhook Relay receives the webhook on the public URL and the plugin forwards it to the right Jenkins endpoint.
The plugin only delivers the webhook to Jenkins — your job decides what to do with it, exactly as it would if Jenkins were reachable from the internet. There is no special Webhook Relay configuration on the job; you use the normal SCM trigger.
For a GitHub job (Freestyle or Pipeline):
-
Create a job: New Item → Freestyle project (or Pipeline).
-
Under Source Code Management, choose Git and set the Repository URL to your repo (add credentials if it is private):

-
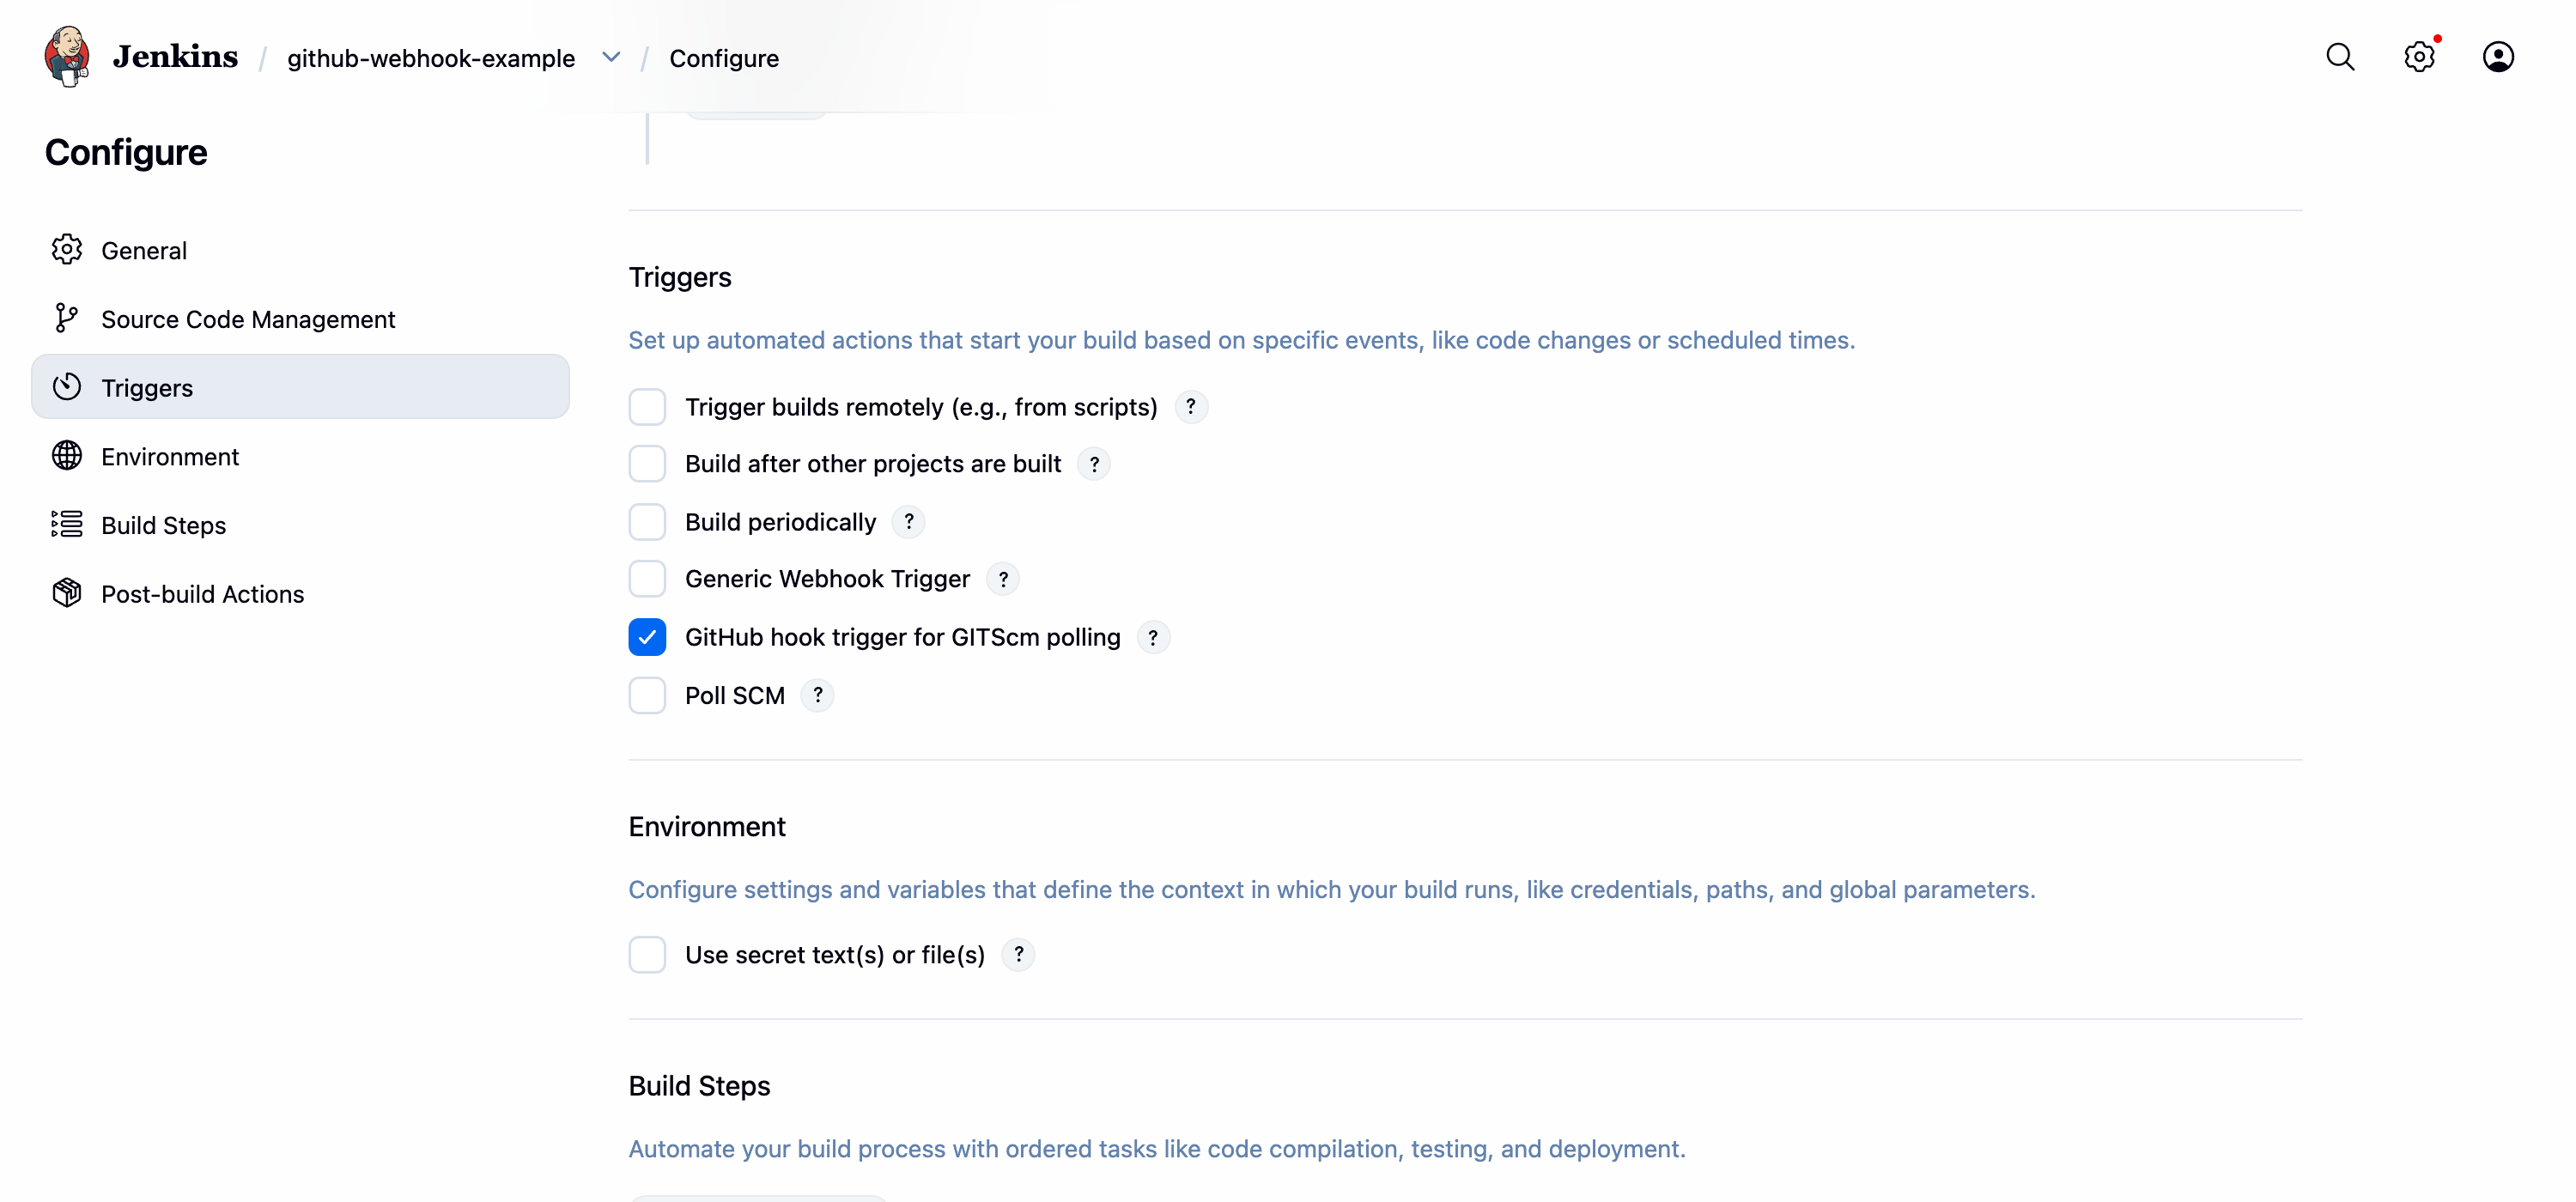
Under Triggers, tick GitHub hook trigger for GITScm polling, then Save:


In a declarative Pipeline the equivalent of step 3 is a triggers { githubPush() } block in the Jenkinsfile (see demo/Jenkinsfile).
For other providers, tick the matching trigger in the same Triggers section:
- GitLab — Build when a change is pushed to GitLab (GitLab plugin).
- Bitbucket — the Bitbucket push trigger (Bitbucket plugin).
- Gitea — the Gitea push trigger (Gitea plugin); the preset delivers to
/gitea-webhook/post. - Anything else — Generic Webhook Trigger (shown in the screenshot above), which fires on any POST and needs no SCM match.
When a push arrives, the build starts — triggered by the webhook that travelled through the bucket and the plugin (note “Started by GitHub push”):

Every webhook is recorded on the bucket's logs page, including the response Jenkins returned. A sent status with a 200 response status means Jenkins accepted the webhook. The plugin links straight to it — both in the Get Webhook URL result and as a View bucket logs & settings link under the connection status — once the bucket has been resolved.

A ready-to-run demo lives in demo/:
mvn -q clean package                                   # builds target/webhook-relay.hpi
docker compose -f demo/docker-compose.yml up --build   # Jenkins on http://localhost:8095
The demo image pre-installs the git, github, workflow-aggregator and generic-webhook-trigger plugins and an admin user via Configuration as Code. Install target/webhook-relay.hpi from Manage Jenkins → Plugins → Advanced, then configure the Webhook Relay section as above. See demo/README.md for details.
| Field | Description |
|---|---|
| Enable | Connect to Webhook Relay and start forwarding. |
| API Key / Secret | Webhook Relay token credentials. Stored encrypted. |
| Bucket name | Bucket(s) to subscribe to (comma-separated). Empty = all buckets. |
| SCM Webhook Preset | Jenkins endpoint to deliver to: github-webhook/, project/ (GitLab), bitbucket-hook/, gitea-webhook/post, generic-webhook-trigger/invoke, or Custom. |
Custom preset / internal outputs: if you configure an internal output on the bucket with a full
http://…destination, the plugin honours that path instead of the preset.
| Symptom | Fix |
|---|---|
| Status shows Authentication Failed | Check the API key/secret. |
| Status shows Disconnected | The plugin reconnects automatically with backoff; check Jenkins logs. |
| Webhook arrives but no build | Make sure the job's hook trigger is enabled and (for GitHub) the Git remote URL matches the pushed repo. |
| Nothing in the bucket logs | Confirm the SCM is pointed at the bucket's public URL (the Get Webhook URL value). |
See CONTRIBUTING.md for how to build, test, and run the plugin locally.
MIT. See LICENSE.